Category: Divi

  • Getting Started with Divi: Using the Divi Builder

    Getting Started with Divi: Using the Divi Builder

    Reading Time: 4 minutes

    The Divi Builder is a drag-and-drop page-building system that makes it easy to create unique layouts. Whether you’re using premade child themes, premade layouts, or creating your own, it’s crucial to understand how to use the Divi Builder. In this post, we’ll step through using the Divi Builder to help you get started on your website designs.

    Note- this article contains affiliate links. Using them helps support this website.

    Accessing the Divi Builder

    The Divi Builder is available on every page and post and in the Divi Theme Builder. It works the same regardless of where you access it. Accessing it in the Divi Theme Builder takes a few extra steps. I’ll cover that in a future Divi tutorial. I’ll build a page in the examples for this Divi tutorial.

    First, create a page (or post) as normal by going to Pages > Add New. Add a title and click Use Divi Builder.

    This takes you to the front end with the Divi Builder enabled. Here, you can add sections, rows, and modules. A section can hold multiple rows, which in turn can hold multiple modules. You’ll need all three elements to create Divi layouts. You can also drag them around, resize them, and style them. It includes one section already enabled, which is outlined in blue. Add more sections by clicking the blue plus icon.

    Add a Row

    To add a row to the Divi Builder layout, click the green icon and select the type of row you want. You have twenty layout options for the row. Each includes a different number of columns in different widths. You can add as many rows as you want, so you can mix and match for the exact page layout you want.

    The row is outlined in green. Each column can hold one Divi module horizontally, but you can add as many vertically as you want. Add more rows by clicking the green plus icon.

    Add Divi Modules

    To add a Divi module to a column, click on the dark gray icon. This opens a modal with all of the Divi modules. Next, search for the module you want by entering a keyword into the search field or scrolling down until you find your module.

    To add more modules, simply click the gray icons.

    Adjust the Divi Builder Elements

    Adjust the sections, rows, and modules by clicking on them. You can drag them from one location to another, open their settings by clicking their gear icons, add padding by dragging the edge, and more.

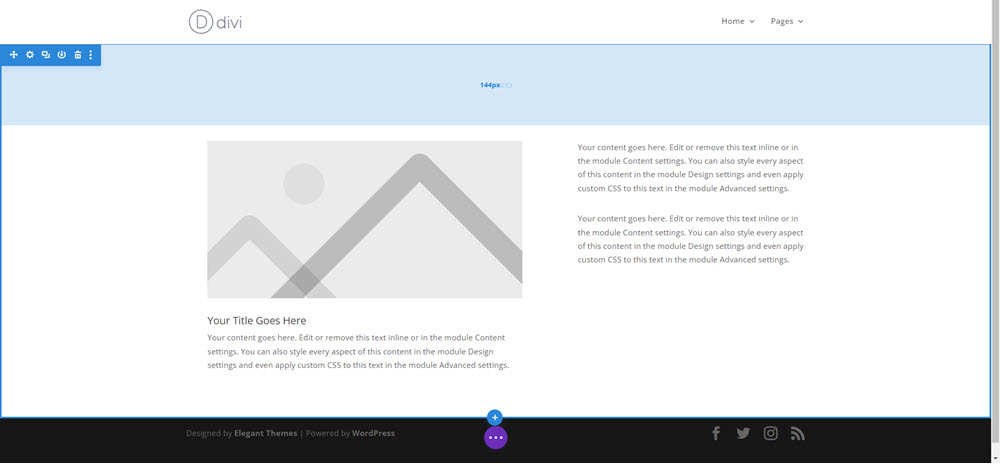
    I’ve added padding to the top of the section by grabbing the top and dragging it down.

    I’ve adjusted the text by clicking it to open the text settings.

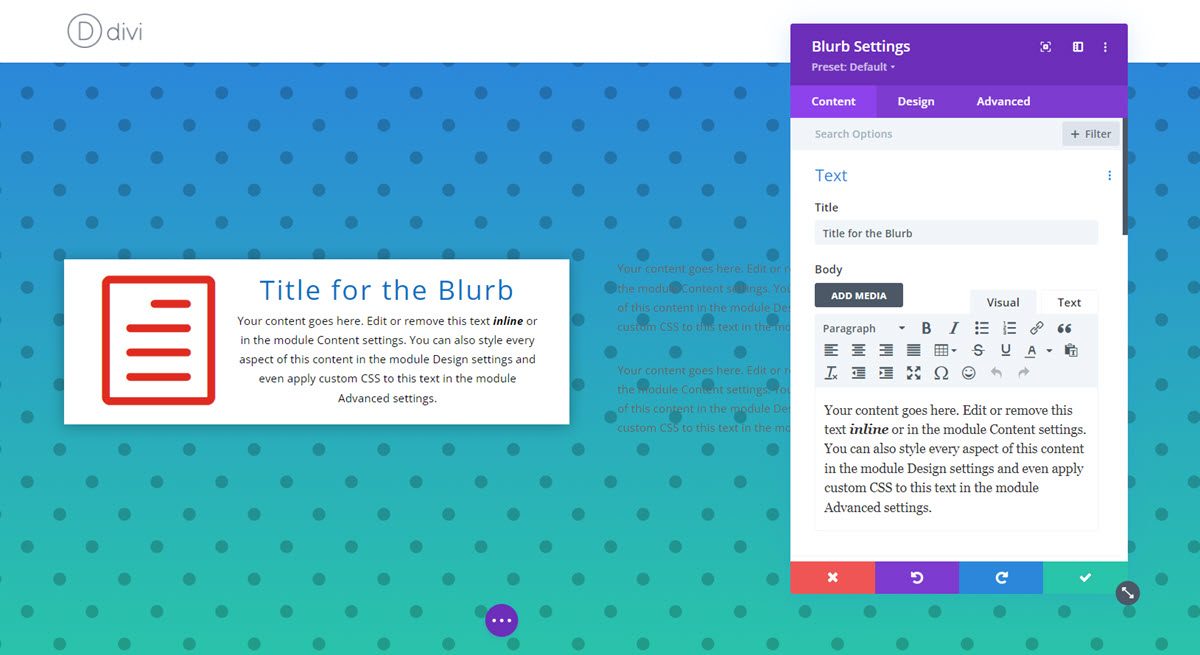
    In this example, I’ve opened the blurb module’s settings by clicking its gear icon. Here you can add your content and style the module.

    To style the module, click the Design tab and make your adjustments. When you’re done, close the module’s settings by clicking the green checkmark.

    Adjust the sections and rows the same way as the modules. in this example, I’ve added a background gradient to the section and selected a pattern. We’ll go through all these settings in future posts.

    Ending Thoughts

    That’s my quick and simple look at how to use the Divi Builder. There are a lot of settings I didn’t cover, but I wanted to start with the basics. From here, you can play around with the sections, rows, modules, and settings to create your own layouts. You can also use these same settings to customize premade layouts.

    For more information about using premade layouts, see the article Getting Started with Divi: Use a Divi Layout.

    I’d like to hear from you. Have you used the Divi Builder? Let me know what you think about it in the comments.

  • Getting Started with Divi: Use a Divi Layout

    Getting Started with Divi: Use a Divi Layout

    Reading Time: 3 minutes

    One of the greatest advantages of Divi is the number of free layout packs that are available within the theme builder. Fortunately, these layout packs are easy to load into Divi and customize for your needs. In this post, we’ll see how to load and use a Divi layout step-by-step.

    Note- this article contains affiliate links. Using them helps support this website.

    What Are Layout Packs?

    Layout packs are pre-designed pages to help you get a head start on your website’s design. They’re available within Divi. Each layout pack is designed around a theme and includes custom colors, graphics, or images. All you need to do is choose the layout you want and then add your content. If you want to build a website using every page from a layout pack, simply create each page individually and follow this process until you’ve created the pages. Since they’re made with the Divi Builder, you can customize them to create a design that’s unique.

    Create a Page

    The free Divi layouts work with any page or post. We’ll build a page. Go to Pages > Add New in the WordPress dashboard.

    Next, add a title and click Use Divi Builder.

    Click the purple menu icon at the bottom of the screen to open the menu and click Load From Library (the plus icon on the far left).

    Scroll or search through the layout packs to find the one you want for this page. Select the layout pack you want to see.

    The layout pack will open to show all the layouts within it. Select the thumbnail of the layout you want to see. Place your cursor over the preview in the left window and scroll down to see the entire page. Click the green button labeled View Live Demo to see the page at the Elegant Themes demo site. Once you’ve decided on a layout, click Use This Layout.

    Once the layout loads into your page, replace the images, text, and links with your content and publish the page when you’re ready.

    Customizing the Layout Pack

    You can also change the colors and fonts, remove or add elements, combine elements from other layout packs, and add your own customizations. This is done in the settings for the modules, rows, and sections. Once you have your fonts and colors selected, you can save them and make them the default for your website. You can also save any modules, rows, or settings to your library to use on any page. We’ll go through these settings in future articles.

    Ending Thoughts on Using a Divi Layout

    Divi’s vast number of free layout packs makes it easy to get started on your website’s design. There are hundreds to choose from, and fortunately, they are easy to use. Following this process makes it easy to quickly build your website using the free Divi layouts.

    Click here to purchase Divi

    For more in this series, see Getting Started with Divi: Installing Divi

    How about you? Have you used a Divi layout? Let me know what you think about it in the comments.

  • Getting Started with Divi: Installing Divi

    Getting Started with Divi: Installing Divi

    Reading Time: 3 minutes

    Divi is an excellent page builder for both beginners and seasoned web developers. Anyone can learn Divi and make amazing websites. In this series, we’ll explore the basics of getting started with Divi. In this post, we’ll go through the steps of installing Divi.

    Note- this article contains affiliate links. Using them helps support this website.

    Purchase and Download Divi

    First, purchase an Elegant Themes membership. Purchase a yearly membership or a lifetime membership. The yearly membership is $89 per year and only includes updates and support while the membership is active. The Lifetime option is a one-time payment of $249 and you’ll always have access to updates and support. Both are good choices, but I recommend Lifetime membership if possible.

    Next, log in to the Members Area and click Download the Theme. Ignore the plugin unless you want to use the Divi Builder with a different WordPress theme. I recommend downloading the Blooom and Monarch plugins while you’re here. We’ll install and use those in future articles. Keep this tab open. We’ll come back to it in a little bit.

    Installing Divi

    In your WordPress website, go to Appearance > Themes in the dashboard menu and click Add New.

    Next, click Upload Theme and then click Choose File. Navigate to your zipped Divi file and select it. Click Install Now and wait for Divi to upload. Be sure to delete any other themes in your list. You won’t need them.

    Finally, click Activate. Divi is now ready to use, but I recommend connecting it to your Elegant Themes account so you can get updates and have access to the free layouts and Divi Cloud.

    Validating Divi

    Next, you’ll need to enter your account information so Divi can get updates. Go to Divi > Theme Options in the dashboard menu. Select the Updates tab.

    Go back to your account dashboard at the Elegant Themes website and select the Account tab. Click API Keys in the left sidebar menu.

    Scroll down to the keys. Add a label for your reference and click the API key to copy it. The label should be something that helps you remember where you’ve used the key, such as your website’s name.

    Next, go back to the Divi Theme Options on your website and enter your username and API Key into their fields. Finally, click Save Changes.

    You can now get updates, use the free layout packs, and access the Divi Cloud.

    Ending Thoughts

    That’s it. You’re ready to use Divi. Installing Divi really is simple. It just takes a few steps to make Divi your active WordPress theme. Adding your Elegant Themes account allows for updates, free layouts, and access to the Divi Cloud. In future articles, we’ll look at setting up Divi’s options for the best SEO. We’ll also look at using the Divi Builder to create pages and using the Theme Builder to create headers, footers, and page layouts.

    Click here to purchase Divi

    For more in this series, see Getting Started with Divi: Use a Divi Layout

    How about you? Have you used Divi? Let me know what you think about it in the comments.